If you’re looking for a sustainable way to start gardening without spending much, DIY plant pots using plastic bottles are the perfect solution. In this guide, we’ll walk you through five creative and practical methods to turn plastic waste into unique planters. Each idea is beginner-friendly, eco-conscious, and great for both indoor and outdoor use.
Why Make Plant Pots from Plastic Bottles?
Plastic bottles are among the most common household waste items. Repurposing them into plant pots helps reduce environmental impact while offering a budget-friendly and flexible option for gardening. They can be cut, hung, painted, or shaped in many ways—making them ideal for creative DIY projects.
What You’ll Need
- Plastic bottles (1L to 2L sizes work best)
- Scissors or craft knife
- Marker
- Nail and hammer or drill (for drainage holes)
- Potting soil
- Plants or seeds
- Optional: acrylic paint, brushes, twine, glue
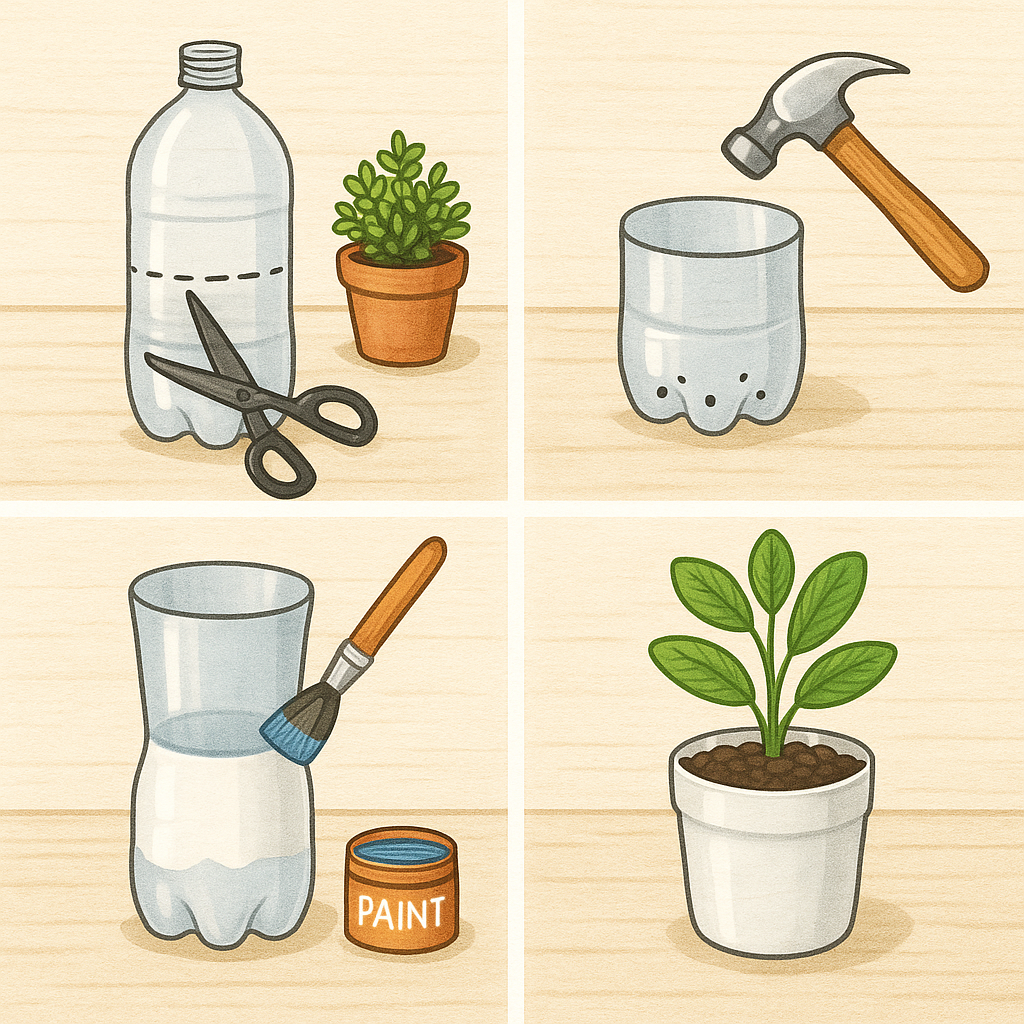
1. Basic Cut Pot
Step-by-Step:
- Cut a plastic bottle in half horizontally.
- Make 3–5 drainage holes at the bottom using a nail or drill.
- Decorate the outside (optional).
- Fill with soil and add your plant.
Best for: Herbs, succulents, and small houseplants.
2. Hanging Bottle Pot
Step-by-Step:
- Cut a wide opening on one side of the bottle.
- Make holes on the ends and thread with twine or wire.
- Add drainage holes on the bottom.
- Hang on a balcony, fence, or window.
Best for: Trailing plants, balcony gardens, and herbs.
3. Self-Watering Pot
Step-by-Step:
- Cut the bottle in half.
- Flip the top half upside down inside the bottom.
- Thread a cotton string through the bottle cap (acts as a wick).
- Fill the top with soil and the bottom with water.
Best for: Busy gardeners who forget to water regularly.
4. Wall-Mounted Vertical Pot
Step-by-Step:
- Cut a window on the side of the bottle.
- Mount bottles horizontally to a wooden board or wall using screws or zip ties.
- Add drainage holes at the bottom.
- Fill with soil and plant shallow-rooted greens.
Best for: Lettuce, spinach, arugula.
5. Animal-Themed Painted Pot (Fun for Kids)
Step-by-Step:
- Cut the bottom third of the bottle.
- Paint it with animal faces (cat, bear, bunny, etc.).
- Let it dry completely.
- Fill with soil and add small plants or flowers.
Best for: Educational projects, gifts, and indoor decor.
You can buy a set of safe, non-toxic acrylic paints for decorating your plastic bottle planters here on Amazon.
Tips for Success
- Always use clean bottles to avoid mold or odors.
- Let paint dry completely before planting.
- Avoid placing plastic pots in full sun for long periods—paint or shade helps reduce heat.
- Use high-quality potting mix for best results.
Conclusion
These 5 step-by-step DIY plant pots using plastic bottles are perfect for anyone who wants to start gardening in a fun, low-cost, and environmentally responsible way. Whether you’re creating a vertical garden, decorating your windowsill, or teaching kids about sustainability, plastic bottle planters are an easy and effective solution.
For another creative and eco-friendly idea, check out our guide on Plant Pots Using Recycled Aluminum Cans.
[…] Looking for eco-friendly gardening ideas? Check out our tutorial on DIY Plant Pots Using Plastic Bottles. […]