Growing herbs indoors is a rewarding and accessible way to bring fresh flavors into your kitchen, even if you’ve never gardened before. With just a few basic materials and some sunlight, anyone can learn how to grow herbs indoors with zero experience.
Why Grow Herbs Indoors?
Bringing your herb garden inside offers several benefits:
- Convenience: Harvest fresh herbs right when you need them.
- Space-saving: Perfect for apartments or homes without outdoor gardens.
- Year-round growth: No need to wait for the seasons.
- Cost-effective: Save money on store-bought herbs.
Best Herbs for Beginners
If you’re just starting, these herbs are easy to grow indoors:
- Basil: Fast-growing and great for pasta, salads, and pesto.
- Mint: Hardy and aromatic, but best grown in its own pot.
- Parsley: Low maintenance and great for garnishes.
- Chives: Requires minimal care and regrows quickly after trimming.
- Thyme: Small and slow-growing, ideal for compact spaces.
What You’ll Need
Before you begin, gather these basic supplies:
- Small pots with drainage holes
- Potting mix (herb-friendly)
- Herb seeds or starter plants
- A tray or saucer to catch excess water
- Sunny windowsill or grow light
- Watering can or spray bottle
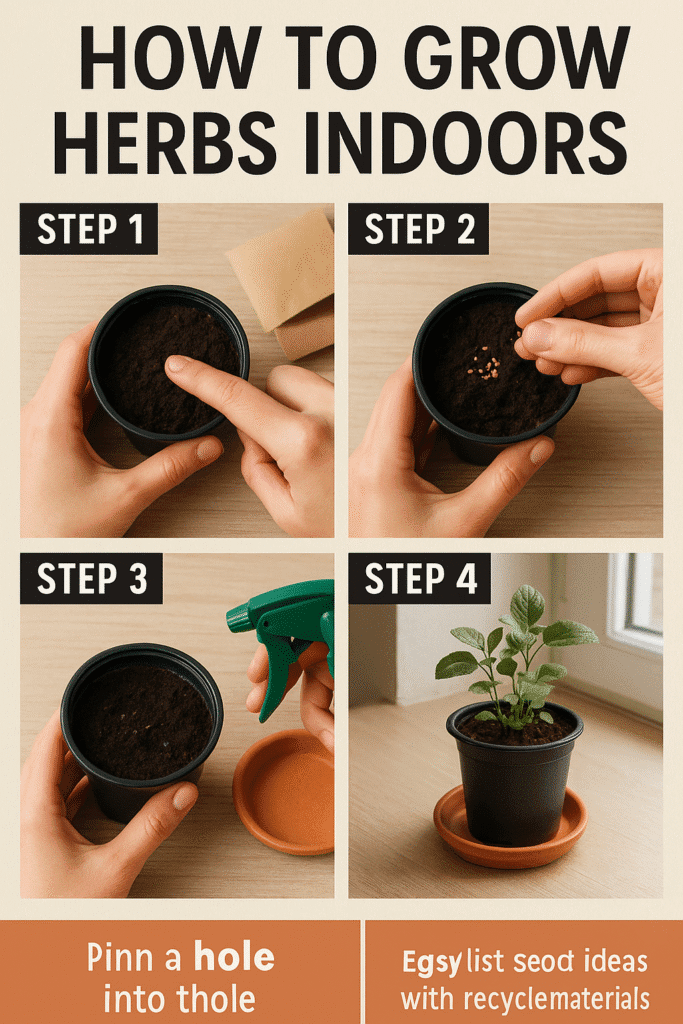
Step-by-Step Guide to Growing Herbs Indoors
Step 1: Choose the Right Location
Herbs love sunlight. Choose a south-facing window that gets 6–8 hours of sun daily. If that’s not possible, use an LED grow light to simulate natural light.
Step 2: Prepare Your Containers
Fill pots with a light, well-draining potting mix. Avoid using garden soil, which may compact and retain too much moisture.
Step 3: Plant the Seeds or Seedlings
- For seeds: Follow the planting depth instructions on the seed packet.
- For seedlings: Gently remove from their container, loosen roots, and place them into the new pot. Cover with soil and pat gently.
Step 4: Water Properly
Water lightly and consistently. The soil should stay moist, not soggy. Overwatering is one of the most common mistakes for beginners.
Step 5: Provide Light and Rotate Regularly
Place your herbs in the chosen spot and rotate them every few days to ensure even light exposure and balanced growth.
Step 6: Prune and Harvest Often
Regular harvesting encourages more growth. Snip herbs just above a leaf node using clean scissors. Avoid removing more than one-third of the plant at a time.
Tips for Indoor Herb Success
- Avoid overcrowding: Each herb needs space to breathe.
- Watch for pests: Use neem oil or insecticidal soap if necessary.
- Fertilize sparingly: Use a diluted, organic fertilizer once every 3–4 weeks.
- Monitor humidity: Herbs like basil benefit from a little extra humidity. Mist if needed.
Common Mistakes to Avoid
- Using garden soil instead of potting mix
- Placing herbs in low-light areas
- Watering too much or too little
- Forgetting to harvest regularly
Creative Display Ideas
- Hanging jars on a wall-mounted rack
- Tiered stands by the window
- Magnetic pots on your fridge
- DIY herb shelf over the kitchen sink
Where to Use Your Indoor Herbs
- In recipes for added freshness
- As garnishes to elevate meals
- Infused in oils or teas
- As fragrant indoor decor
Need quality organic seeds or grow lights? Browse affordable options at Burpee Gardening.
Want more sustainable ideas? See our article on Handmade Greeting Cards with Waste Paper.
Conclusion: Start Small, Grow Fresh
You don’t need a green thumb to enjoy the benefits of homegrown herbs. By following these beginner-friendly steps, you can create a thriving indoor herb garden that fits your space and lifestyle.
Save this guide for your next planting weekend—or share it with a friend starting their indoor garden journey!
FAQ: Growing Herbs Indoors
Q1: How long does it take for herbs to grow indoors? Most herbs germinate within 7–21 days. You can begin harvesting in 4–6 weeks depending on the herb.
Q2: Can I grow herbs in my kitchen? Yes! As long as the kitchen has good sunlight and ventilation, it’s an ideal location.
Q3: Do herbs need to be repotted? Yes, when they outgrow their current pots or roots begin to circle the container, it’s time to transplant.
Written by Kate Smith | Plant Care Enthusiast & Urban Gardener